Disclosure: This content is reader-supported. This means if you click on some of the links, then I may earn a commission.
Ever wondered why your printables don’t look quite right when printed at home? You’re not alone!
Today, I’m sharing a special treat straight from my membership, The Creator’s Growth Club. We’re diving into the nitty-gritty of margins and print bleeds for printables, a question that often stumps even the most seasoned digital product creators and sellers.
Whether you’re designing daily routine sheets for your Etsy store or running your shop, understanding these details is crucial.
Stick with me, and we’ll ensure your printables look spectacular, whether printed at home or by a professional.
Understanding Margins and Print Bleeds for Printables
So as I mentioned, one of our community members recently asked a fantastic question about using margins and print bleeds for printables. She wanted to know the right sizing and whether or not she should use them when designing products like daily routine sheets.
When you’re designing printables, it’s crucial to consider how your customers will print them. Most customers will print from home using a regular DIY printer, which usually doesn’t print to the very edge of the page. So, let’s dive in and figure out how to make your printables look fabulous, whether printed at home or by a third-party.
Why You Should Care About Margins and Print Bleeds
Margins and print bleeds are essential to ensure your designs look professional and don’t get cut off during printing. Imagine someone buys your beautiful daily planner, but crucial parts of your design are missing because the printer couldn’t handle the edges… a nightmare, right?
Creating Margins in Canva
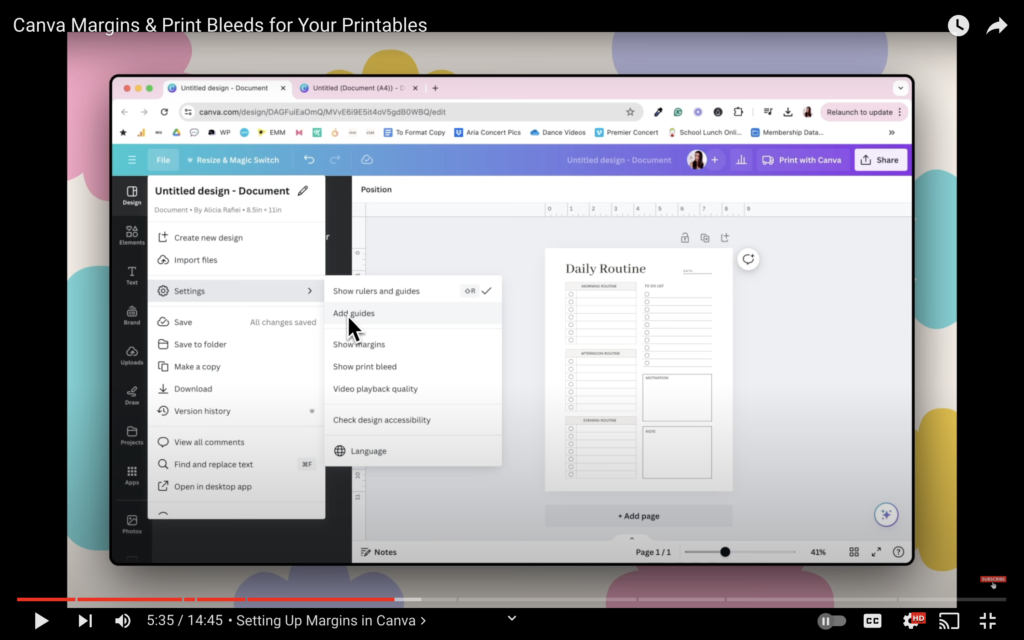
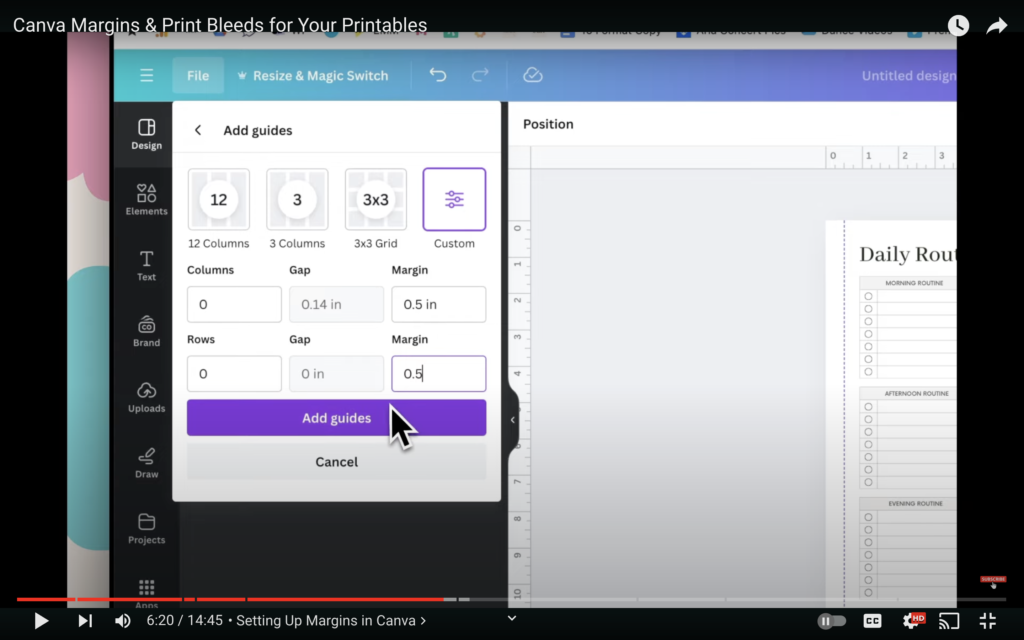
Alright, let’s talk margins. In Canva, you can easily create guidelines to ensure your designs stay within printable areas. Here’s how you can do it:
- US Letter Size:
- Go to File > Settings.
- Click on Add Guides, then Custom.
- Set Columns and Rows to zero.
- Set margins to 0.5 inches (half an inch) on all sides.
- A4 Size:
- Again, go to File > Settings, then Add Guides.
- Set margins to 13 mm (the equivalent of 0.5 inches).
These guidelines ensure that your design elements won’t be cut off, leaving your printables looking top-notch.
Adjusting for Binding
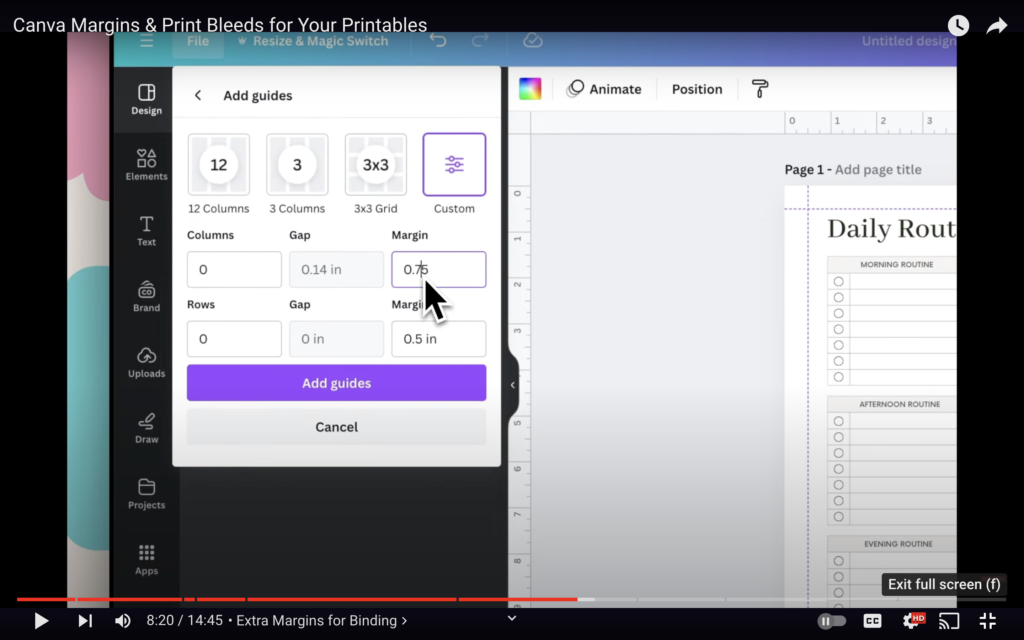
If your customers are likely to bind their printables, you’ll need additional margins on the left or right side:
- For US Letter Size, set the left and right margins to 0.75 inches.
- For A4 Size, set them to 19 mm.
This extra space ensures that nothing important gets lost in the binding process.
Understanding Print Bleeds
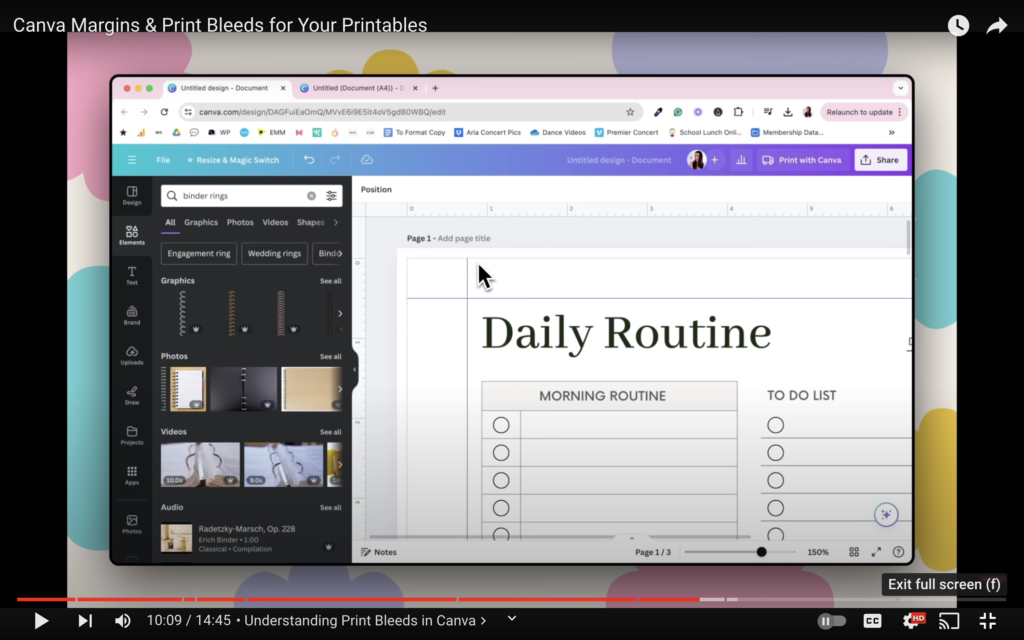
Next up, print bleeds. This is crucial if your design goes all the way to the edge. In Canva:
- Go to File > Settings.
- Click on Show Print Bleed.
You’ll see an area that marks where the print will cut off. Anything beyond this line won’t appear when printed on a standard home printer, which means you have to keep your essential design elements within this boundary.
Designing Within Boundaries
If you’re using decorative elements like floral patterns, ensure they stay within the print bleed margin. For example:
- Remove the background colour if you don’t want a white border.
- Adjust design elements to stay within the print boundaries, ensuring nothing crucial is cut off.
Testing on Different Sizes
Remember to test your design on both US Letter and A4 sizes. For a cohesive look across different formats, you might need to adjust the margins and print bleeds slightly depending on the size.
Wrap-Up and Final Tips
And there you have it! Now, you’re equipped to create stunning printables that look professional, no matter where or how they’re printed. Remember, the key is to know your customer and how they’ll use the product.
If you found this tutorial helpful, please give it a thumbs up! Got any questions or comments? Drop them down below—I love hearing from you.
And if you want more exclusive content like this, PLR templates, workshops, a private community, and direct feedback from me, come check out The Creator’s Growth Club. Use code YOUTUBE to get your first month for half price. Join us here.

