Disclosure: This post may contain affiliate links, meaning if you decide to make a purchase via my links, I may earn a commission at no additional cost to you.
I still remember the very first time I uploaded a digital art print to Etsy.
I was sitting at my kitchen table with a cup of tea, playing around in Canva while my daughter napped, just experimenting. I’d always loved design, and after seeing all those stunning printable wall art pins on Pinterest, I thought, why not me?
That little moment turned into something much bigger. Within a few days, I had my first sale… and that simple “cha-ching” notification was the start of a completely new chapter for me, one where I could combine creativity, flexibility, and family life.
So if you’ve ever wondered how people are creating and selling those beautiful printable art pieces on Etsy (and you’re ready to try it yourself!), you’re in the right place.
Below, I’ll walk you through exactly how to create your own digital art prints from start to finish. The same process I used to grow my own shop and start earning passive income online.
And if you’d like to see the steps in action, I’ll also include my video tutorial links throughout so you can follow along visually too.
Let’s dive in. 🌸
Step 1: Choose Your Theme or Style
Before you start designing, take a little time to decide what kind of art prints you want to sell, and who you want to create for.
Do you want to design minimalist line art for home offices? Whimsical nursery prints? Boho quotes for bedrooms?
Knowing your style and audience makes everything easier, from picking your colours and fonts to writing your product descriptions later on.
Think of your Etsy shop as a gallery. The more cohesive your style, the more your listings will stand out and feel “put together.”
Step 2: Gather Your Design Assets
Once you have your style in mind, it’s time to find your design elements, things like illustrations, clipart, and textures.
My two go-to sites for high-quality, commercial-use design assets are Creative Market and Creative Fabrica. Both platforms are filled with beautiful illustrations and graphics created by professional designers, and they include clear licensing options for use in your Etsy products.
When you buy under a commercial licence, you can confidently use those assets in your own designs without worrying about copyright issues.
Pro tip: Look for bundles that match your theme (like “botanical line art” or “neutral home prints”) so you can create a full collection instead of just one print.
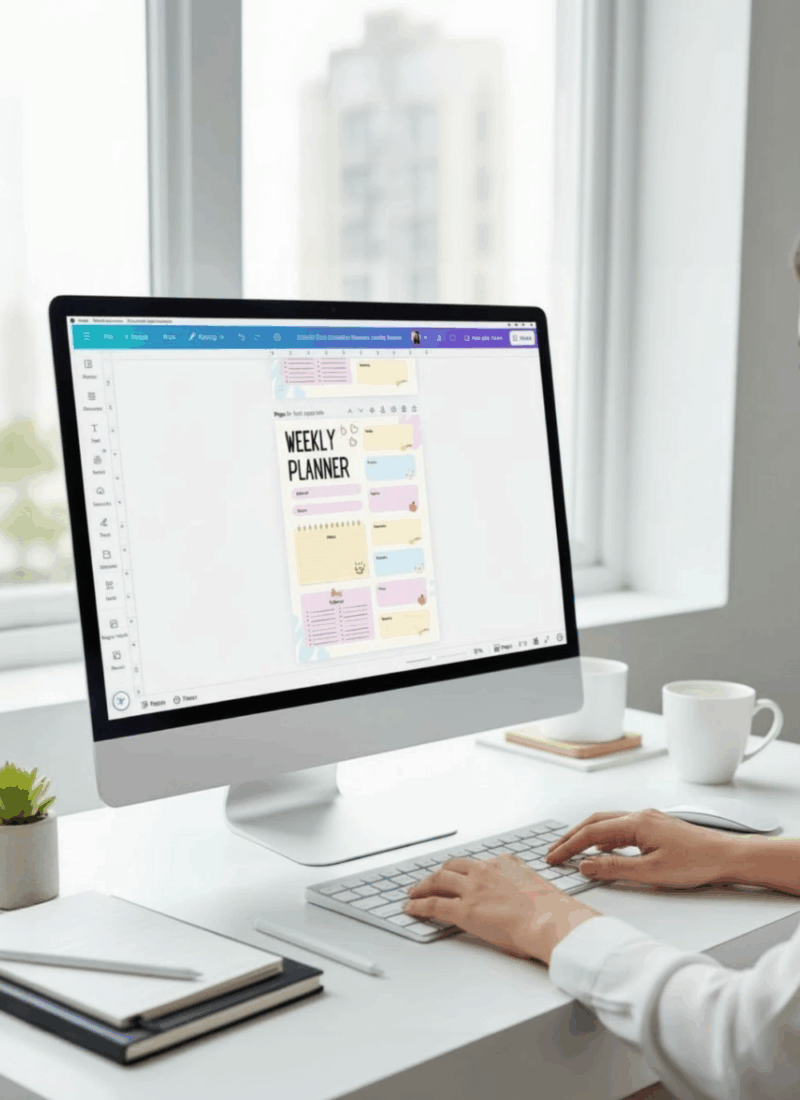
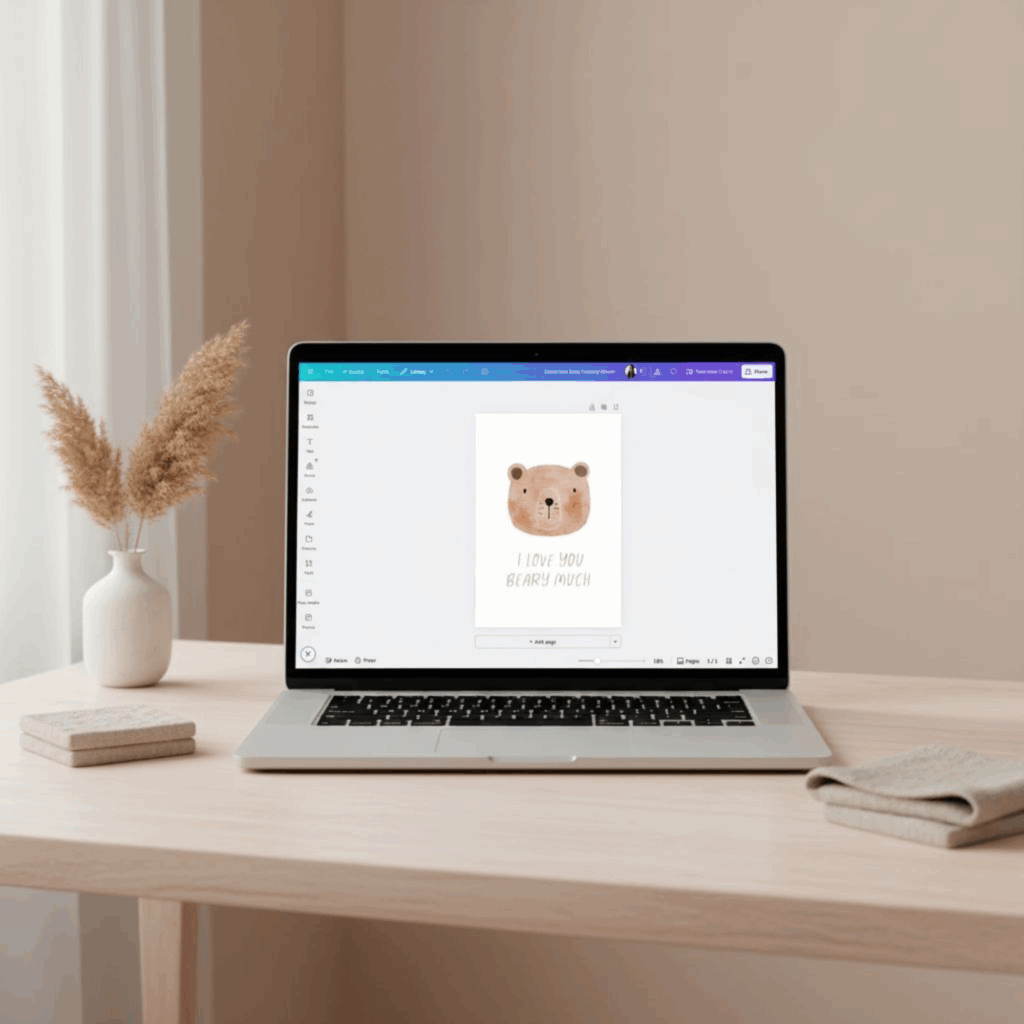
Step 3: Start Designing in Canva
Here’s where the fun begins!
For my digital art prints, I use Canva Pro, it’s beginner-friendly, intuitive, and perfect for creating beautiful designs without needing Adobe-level skills.
Start with a canvas that’s 8×10 inches (this is the most common printable art size), and design your first piece. Once you’re happy with it, you can easily resize it into multiple ratios so your customers can print in different frame sizes.
I recommend offering your artwork in four ratios:
- 4:5 ratio (8×10, 16×20)
- 3:4 ratio (9×12, 12×16)
- 2:3 ratio (8×12, 12×18, 20×30)
- Paper sizes (A3, A4, A5)
This covers almost every standard frame your buyers might have, which means fewer questions and happier customers.
Step 4: Save and Export Your Files
Once your design is ready, export it as a PDF Print file at 300 DPI, this keeps your artwork crisp and high-quality when printed.
Repeat the process for each of the different ratios you created.
To make uploading easier, compress all your files into a single ZIP folder before adding them to Etsy. It keeps your listing clean and professional.
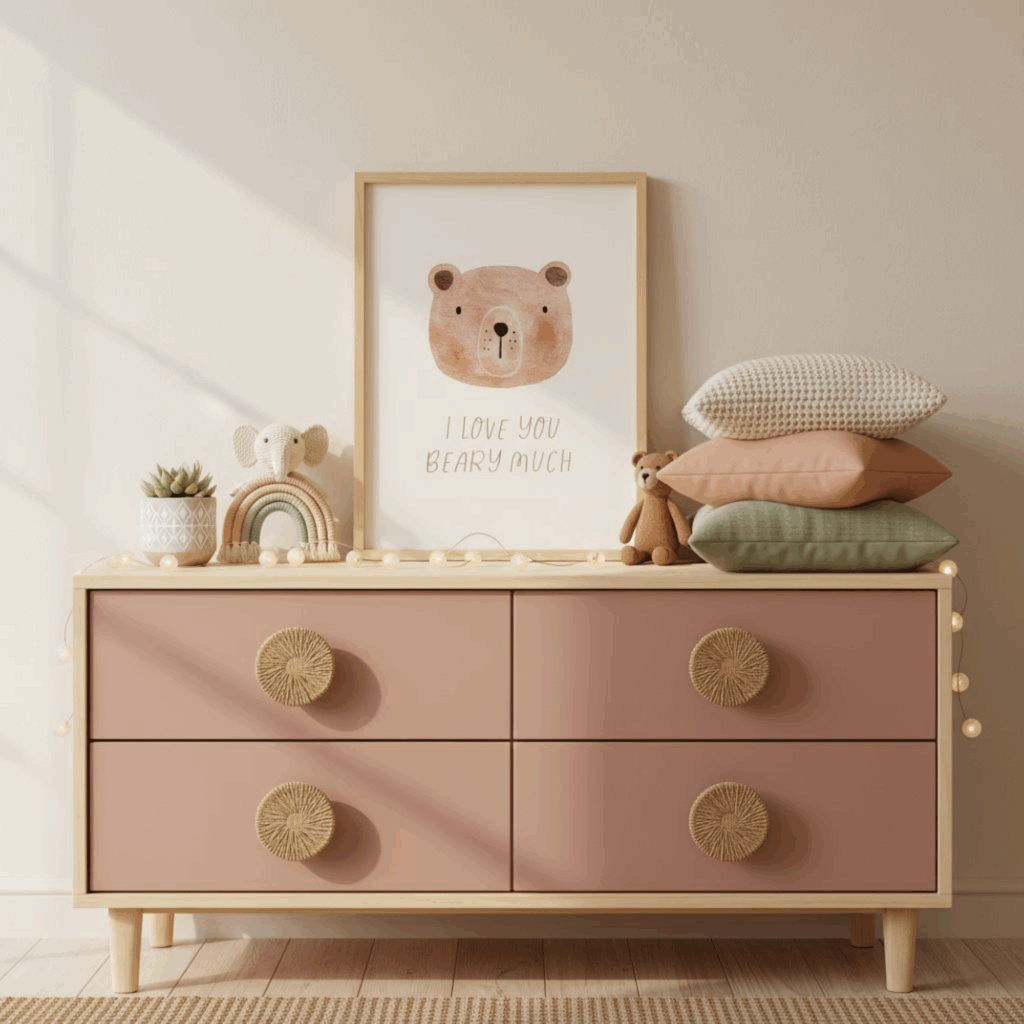
Step 5: Create Beautiful Mockups
Good mockups make all the difference.
They help customers visualise how your art will look framed and styled in their home, and can be the reason someone clicks “add to cart.”
I create all my mockups right in Canva, using two different methods:
- Search Canva’s image library: just type something like “nursery frame mockup” or “living room art mockup.” Drop your artwork into the frame and adjust until it looks natural.
- Use Canva’s Smartmockups tool: it automatically places your design into a realistic setting with one click. (It’s such a time-saver!)

Step 6: Upload to Etsy
Now it’s time to list your artwork!
When creating your Etsy listing, make sure to:
- Write an SEO-optimised title (use keywords like “boho wall art printable” or “modern abstract art print”)
- Add a detailed description that tells buyers exactly what they’ll receive
- Include your mockup images to showcase the artwork beautifully
- Upload your ZIP folder containing all your printable sizes
Once everything’s ready, hit publish! 🎉
And that’s it… your very first digital art print is live and ready to sell
Bonus Tip: Batch Your Creations
If you’re already in a creative flow, try designing a small collection instead of just one print.
For example:
- A set of 3 coordinating prints for a nursery
- A series of abstract line drawings in a neutral palette
- A bundle of motivational quotes in matching fonts and colours
Bundles not only look beautiful in your shop, they often increase your average order value too!
Now’s The Time To Start
Creating and selling digital art prints was my entry point into the world of digital products. It gave me confidence, freedom, and a foundation to build on.
If you’ve been dreaming about starting something of your own, this is a beautiful and achievable place to begin. You don’t need fancy tools or a design degree, just creativity, curiosity, and the willingness to learn.
Start with one idea, one design, one listing. That’s all it takes to get the ball rolling.
And if you’d love a little community support (plus free trainings, digital product ideas, and accountability while you build), come join us inside my free creator community below.
Join The Digital Creator’s Collective
If you’re ready to go from inspired to actually creating, I’ve got a free course inside my community that walks you step-by-step through how to design, package, and sell your own art prints on Etsy, the exact process I use in my own shop.
Inside The Digital Creator’s Collective, you’ll also find:
💡 Weekly inspiration and new product ideas
🎥 Free tutorials and trainings
🤝 A supportive community of creative entrepreneurs learning and growing together
👉 Join the free community and start the Digital Art Creator’s Course today, it’s completely free and a perfect first step if you’re ready to build your own digital product shop.