Are you looking for a way to share your expertise with the world and make some extra money in the process? If so, you may be wondering how to create an online course.
Luckily, there are a number of platforms that make it easy to share your knowledge with your students. One such platform is Teachery.
In this blog article, I’ll walk you through how to make an online course with Teachery from start to finish.
Creating an online course can seem like a daunting task, but with Teachery it’s simple. In fact, you can have your course up and running in no time at all.
Ready to get started?
What is Teachery?
Teachery is an online platform that makes it simple to create and sell beautifully branded courses. With Teachery, there’s no need to worry about hosting or managing your own website. Teachery takes care of everything, from hosting your content, all the way to taking payment for your course.
And because Teachery is included within WAIM Unlimited (I’ll explain more about this later) you can actually get access to Teachery for free, for life. Cool right?
So whether you’re a seasoned educator or a first-time instructor, Teachery is the perfect solution for creating and selling your online course.
Thanks, Teachery!
How to get started with selling a course on Teachery
If you’re thinking about selling a course online, Teachery is a great platform to use. With your course content ready to go, in just a few simple steps, you can create an online course and start selling it to students from all over the world.
Here’s how to get started:
Come up with a course topic
When you’re ready to start teaching a course, the first thing you need to do is come up with a topic. This may seem like a daunting task, but there are a few ways to make it easier.
First, ask yourself what you’re passionate about. What are you an expert in? What do you love to talk about? Once you’ve identified your areas of interest, brainstorm some potential topics for your course.
Try to come up with a few different options, so that you can choose the one that best fits your goals and interests. You can also look for inspiration by checking out courses offered by other instructors. See what topics are popular and how they’re being taught. With a little bit of thought and creativity, coming up with a course topic can be fun and exciting.
Before I started and launched my own online course with Teachery, The Passive Income with Canva Course, I invested in an online program that guided me through the process of turning my “zone of genius” into an online business, which included developing an online course.
Passive Income Planner Girl was the program that helped me through this process and I highly recommend it to you if you’re ready to turn your knowledge into a digital planner and that planner into a heart-centred online business you LOVE!
Click here to learn more about Passive Income Planner Girl and learn how to develop your unique course idea!
Choose a format for your course
Once you’ve settled on a topic, it’s time to start thinking about the format of your course. Will it be video-based, audio-based, written or a mix of all three?
If you’re not sure which format is right for you, think about what will work best for your students. What format will allow them to learn the material in the way that’s best for them?
You should also consider what you’re most comfortable with. If you’re not sure you’re ready to be on camera, there’s no need to force yourself into it. You can always start with a written or audio-based course and add video later on.
The important thing is to choose a format that you’re comfortable with and that will allow your students to learn in the way that’s best for them.
Create engaging content
Once you’ve chosen a topic and format, it’s time to start creating your course content. This is where the real work begins, but it’s also where you get to be creative and have fun.
When creating your content, keep your students in mind. What will they want to learn? How can you make the material engaging and exciting?
Remember, you’re not just teaching a course, you’re also entertaining your students. So make sure your content is engaging, informative and fun.
If you need help coming up with your course content, then I recommend checking out Cindy Bidar’s course, Quick & Easy Course Creation. This course (isn’t this meta!) will give you the step-by-step directions covering everything you need to know about outlining and organising your lessons, creating a video script, designing slide decks, recording videos, and developing printables to help your students succeed.
Set up your course with Teachery
Once you’ve created your content, it’s time to start setting up your course with Teachery. Below is your step-by-step guide to getting your Teachery course ready for launch:
Step 1: Sign up for a free 14-day account with Teachery
Creating your account with Teachery is easy, just click this link to get a 14-day free trial and get started by popping in your first and last name along with your email address.
Teachery offers two different subscription plans: Monthly & Yearly. The monthly plan is $49.00p/m or save 20% with the yearly plan at $470p/y.
Now at the beginning of this article, I mentioned that you can get access to a lifetime Teachery account for free with Wandering Aimfully Unlimited.
Wandering Aimfully Unlimited or WAIM for short is an un-boring business coaching program that will show you exactly WHAT to improve in your online business and in WHAT ORDER, so you can grow your revenue and live a more spacious, satisfying life.
When Caroline and Jason Zook (the creators of WAIM Unlimited and Teachery) developed their monthly coaching program, they wanted to include everything they have created in the past or will ever create in the future as part of their program. That’s kind of the unlimited part 😉 And because it includes anything they’ve created in the past, this includes (among other amazing courses and programs) Teachery!
If you’re interested in joining WAIM Unlimited, Jason & Caroline only open the doors to their coaching program twice a year… but, if you’re interested in joining while the doors are closed, I have a super special link that will give you access to join at any time. Just email me at hello@aliciarafiei.com with the subject line “I want to join WAIM” and I’ll send you the special, secret, VIP only link 😉
Step 2: Create your course
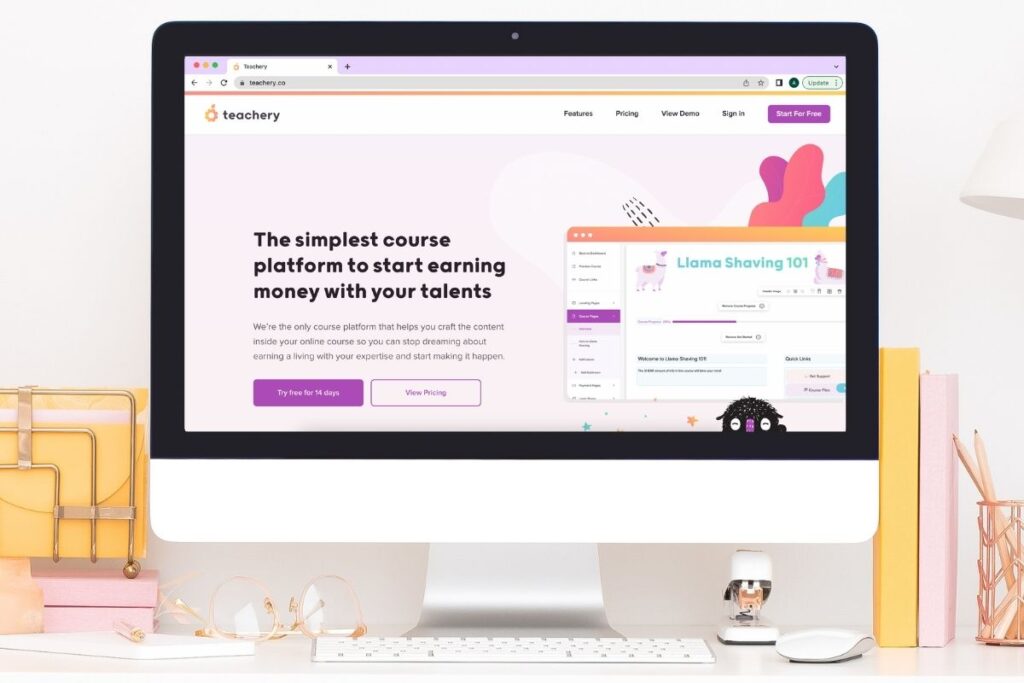
First, you want to enter your Course Name (don’t worry, you can change this later) and then choose your Course Template from either Minimal or Sidebar (again, don’t worry, you can change this later too). Then click the “Get Started” button.
After clicking the Get started button, you’ll then be presented with the dashboard for your new online course.
Step 3: Design your course
Now comes the fun part. Making your course look pretty.
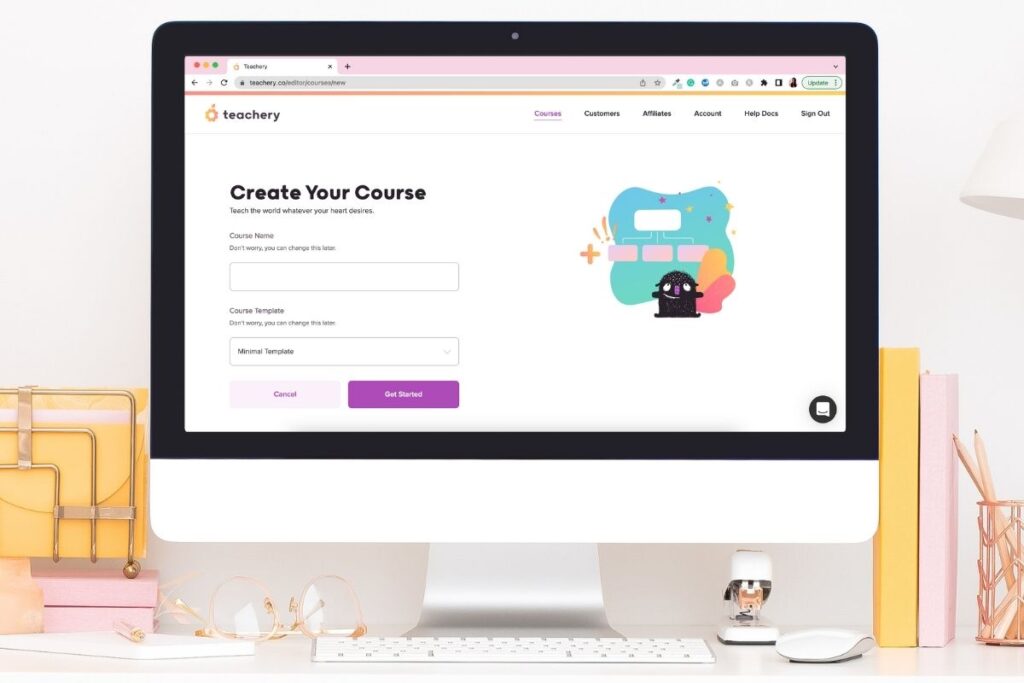
With Teachery, you can change the colours of just about anything, choose your fonts, select your layout, and even customise the dashboard header image. This is one of my favourite features of Teachery, the amount of creative control I have over how my course will appear.
Use the tools in this course to your advantage and have fun with it. Make your lesson look exactly how you want it to appear.
To change up the style of your course, navigate to the “Style Your Course” tab and you’ll see all of the different ways you can customise the look and feel of your course.
If you want to save yourself a ton of time styling your course, then I recommend you check out The Customer Journey Course by Maria Alejandra. The lessons in this course will teach you how to build a Student Hub within Teachery, but the methods and templates may also be used to style a course with Teachery.
I used it to style my own courses, so I know it’s a great program.
Step 4: Add in your course content
This is where all of the hard work you put into creating your course content will come into play.
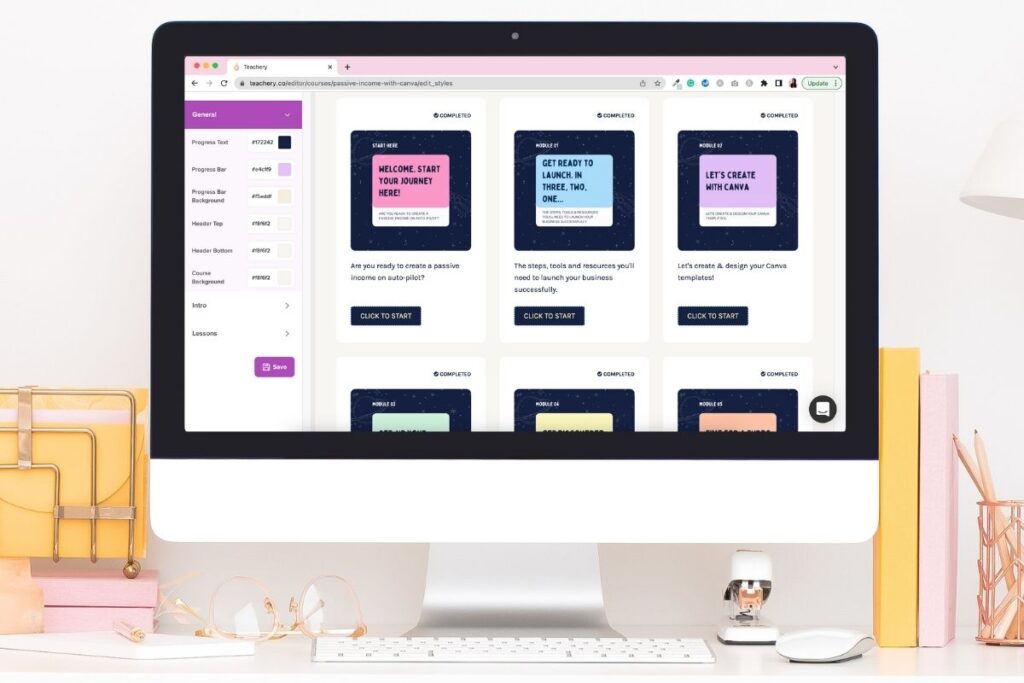
Teachery makes it super simple to add in your content and then organise it into lessons and modules.
To start adding in your content, go to the “Course Pages” tab and then click on the “Add Lesson” button. From here you can add images, text and videos to share your knowledge with your students.
Teachery saves automatically as you go, so no need to worry about ever losing your work.
Step 5: Set your course price and set up a payment page
The final step is to set your course price and then create your payment page.
To do this, go to the “Payment pages” tab and then “+ Add payment page” enter in the payment page name, whether you want to offer a fixed price or monthly/yearly subscription and then add in your course price.
When you’re ready, click on the “Create page” button
You can also choose to offer a discount code by clicking the “Promo codes” tab.
Step 6: Preview your course
Before you launch your course to the world, it’s always a good idea to take a look around and make sure everything looks and feels the way you want it to.
To do this, go click on the “Preview course” button. This will open up your course in a new window so you can take a look around.
If everything looks good, then you’re ready to launch your course!
Now, if you need more help, Teachery has THE BEST customer service ever, so don’t hesitate to get in contact with Jason the co-founder of Teachery. Alternatively, you can access their super helpful and detailed “Help Docs” for answers to your technical questions.
Get feedback from beta students (optional)
Once you’ve created your course, it’s time to get some feedback. The best way to do this is to find a group of beta students and let them try out your course.
Beta students are people who agree to test out your course and give you feedback before it’s launched. They’re a vital part of the course creation process, so make sure to choose them carefully.
Look for people who are honest and open-minded, and who will give you constructive feedback that you can use to improve your course.
Launch your course
After you’ve created your course and got feedback from your beta students, it’s time to launch your course to the world.
If you have an email list, this is a great time to let your subscribers know about your new course. You can also share it on social media, YouTube, Pinterest, on your own (or someone else’s) Podcast, on your blog or wherever else your audience hangs out online.
And that’s it! Your course is now live and available for students to enrol in.
Congratulations, you did it!
Now that you know how to create an online course with Teachery, it’s time to get started and launch your own course.
Creating an online course can be a lot of work, but it’s also a lot of fun. And the best part is that once you’ve created your course, it’s there forever. So you can continue to sell it and earn money from it for years to come. Hello, passive income 😉
So what are you waiting for? Get started today and create your own online course with Teachery today!


