Disclosure: This post may contain affiliate links, meaning if you decide to make a purchase via my links, I may earn a commission at no additional cost to you.
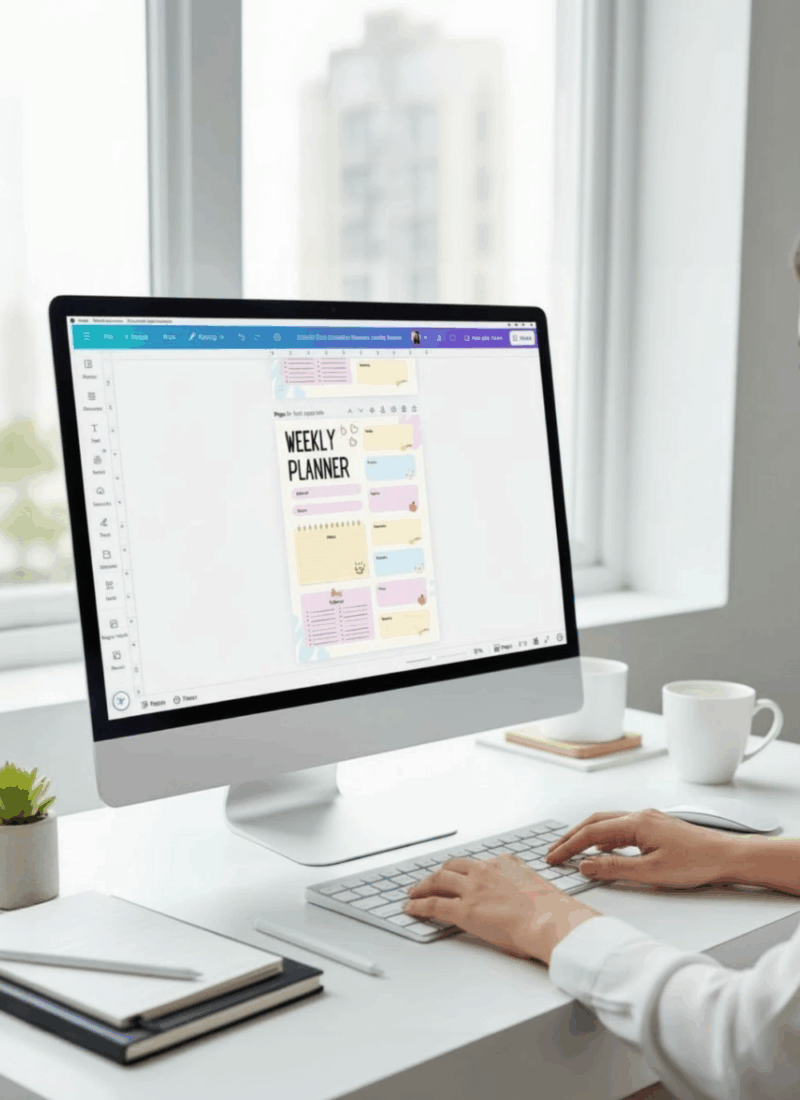
Ever dreamed of getting that first Etsy sale for something you made yourself, even if you don’t have fancy design skills? That’s what I’m showing you today: how to make a digital journal from scratch in Canva, walk you through each step, and help you get your product listed faster, with real examples.
If you’re thinking, “But I’m no artist,” or “Where do I even start?”—stick with me! This is part two of my digital journal series, and I’m going to unpack everything from choosing your journal niche to designing, organising, linking, and even selling your first digital journal. Let’s skip the doubt, roll up those sleeves, and turn your ideas into something that both looks good and sells.
Choosing the Right Journal to Make (and How to Know It’ll Sell)
The very first thing I always tell people: don’t just pick any journal idea because it sounds good. You want something people actually want to buy. That means checking real sales, not just going with your gut.
For this example, I went with a digital gratitude journal. Here’s why:
- Gratitude journals are always in demand, and buyers love them for self-improvement.
- They’re easy for beginners to make—no need for complicated templates or complex graphics.
- You can offer them as printable or digital, which doubles your potential audience.
But don’t just take my word for it. I use a simple system to check what’s selling right now.
How I Do Market Research With Etsy and Everbee
Here’s how I make sure my idea isn’t a flop before I design anything:
- Fire up Etsy and the Everbee Chrome extension (which is my go-to Etsy research tool).
- In Etsy’s search bar, I type in the core keyword plus “digital,” like
gratitude journal digital. - Once the results load, Everbee shows me listings that match my keyword. I scan through the first page. What catches my eye? Design styles, use of colours, type of fonts, the way layouts are arranged, content inside, and what makes some listings pop out from others.
- I never copy others. Instead, I use these real listings for inspiration to tweak my own ideas.
The best part of using Everbee for Etsy research? It’s not a guessing game. I open Everbee’s Product Analytics, set it to sort by revenue from the past 30 days, and see which gratitude journals have the most sales. I click on top sellers, check their cover art, inside pages, tabs, icons—whatever stands out.
I dig a little deeper and open these listings in Etsy, checking what features they include. Are there navigation tabs? Bonus trackers? Simple or detailed prompts? It’s all about catching the little things buyers love so I can include similar (but unique) elements.
Organising What I Find (No More Blank-Page Fear)
Before I even open Canva, I open up Notion (or you could use Google Docs) and jot down what’s on my mind:
- Purpose statement for the journal
- Section ideas like:
- Today I’m grateful for
- Things that made me smile today
- Something that inspired me today
- People I’m grateful to have in my life
- Daily affirmations
- Notes / Free thoughts
I also write down my key design choices. For this journal, I wanted a soft, minimalist aesthetic, a natural colour palette, and simple icons. Quick side note: I scroll Pinterest to spot design trends. Outback and Wild West themes are everywhere right now, and they give your product a unique twist shoppers notice.
All this research sits in my Notion page ready for when I start designing. I never want to stare at a blank Canva page and panic about what goes where.
If you want help finding tools I use or want ready-made templates and guides, I keep them all inside Digital Creators Collective, my free community.
Getting Your Design Assets Sorted Before Opening Canva
I’m a big believer that a little planning saves hours later. Having all your design assets uploaded and ready makes Canva feel way less like a minefield.
Collecting Your Journal Design Elements
- Create a folder in Canva just for this project. Inside that, set up subfolders for:
- Patterns (e.g. that Wild West seamless pattern I found on Creative Fabrica)
- Paper textures (for backgrounds)
- Vector icons or SVG elements (so you can recolour and match them to your theme)
- Head to a site like Creative Fabrica, type in your design theme (mine was “Wild West”), and look for patterns and textures that fit.
- Download elements:
- A set of seamless patterns for backgrounds and dividers
- SVG icons that you can recolour in Canva (this is key for matching your colour scheme easily)
- Realistic paper textures for that “tactile” look (makes digital journals feel more premium)
Organising and Choosing What Stays
You want your folder structure neat: Patterns, Paper Textures, and Vector Elements go into separate subfolders. Having everything pre-uploaded means you spend less time hunting for files and more time actually designing.
My tip: Don’t overload your journal with clashing patterns or too many colours. Let your theme and a handful of design elements do the heavy lifting. Cohesive journals get better reviews and sell more.
If you want to grab the same resources I use, remember, I’ve organised them all for easy access inside Digital Creators Collective.
Setting Up Your Canva Journal Project
Ready to design? Before you start dragging boxes and icons everywhere, let’s sort the basics.
Start With Proper Sizing
Most people shop for journals that fit their device. That’s why I use US Letter size (8.5 x 11 inches). It works for tablets, iPads, or as a printable.
Here’s a step-by-step to get the right setup:
- Go into Canva and hit “Create a design.”
- Choose “Custom size” from the left menu.
- Enter 8.5 for width and 11 for height. Make sure the units are inches.
- Click “Create new design.” You’re set!
Upload and Organise Your Assets
Before you begin the creative fun, upload the patterns, textures, and icons into your project folder in Canva. Pre-organising keeps everything at your fingertips, stopping you from breaking your flow.
Have Your Outline Ready
Glance over your research notes and journal content before moving to Canva. Knowing what you want to include (not just how it’ll look) makes the whole design process smoother and, honestly, much less stressful.
When I plan out:
- Font choices,
- Colour palette,
- Icon style,
I make sure I stick to it across every page. Consistency is what makes your digital journal feel professional.
Designing the Journal Layout and Navigation
Now, the heart of your product: the daily journal page and navigation. You want each page to be simple, inviting, and easy for buyers to use (even if they aren’t tech-savvy).
The Daily Page Layout
I keep my sections straightforward:
- Today I’m grateful for
- Things that made me smile today (I like to pop in a few smiley icons)
- Daily affirmations
- Notes and free thoughts
Keep enough white space between sections. If it feels cramped, remove something. Less really is more here.
Building the Hyperlinked Navigation Bar
Here’s where your digital journal stands out. A hyperlinked navigation bar lets users jump to any month, day, or section in a tap.
Creating the Month Tabs
- Add boxes or rectangles at the top of the page for each month: January to December.
- Inside each shape, type the month’s name (e.g. Jan, Feb), size them down if needed, and keep the style tidy.
Creating the Day Tabs
- Below the months, line up smaller boxes for days 1 to 31.
- Each box gets a number—copy and paste, then just change the number.
- Even if February only has 28 days, having up to 31 days doesn’t hurt… and it saves effort on format.
Formatting and Adding Extras
After adding all tabs:
- Remove their fill colour (transparent looks much cleaner).
- Add lines or divider slants between each tab to separate months and days.
- Drop in icons for quick navigation: a home icon to go back to the cover, a notes icon for jumping to bonus note pages.
Hot tip: Each day and month must be its own box so you can hyperlink individually. A long text box with “1, 2, 3,…” can’t be linked separately.
Align everything neatly using Canva’s position and arrange tools. Select all your tabs, hit “Tidy up” and Canva will straighten them out for you.
Designing the Cover and Monthly Dividers
With the guts finished, it’s time to make your journal look irresistible.
Creating a High-Quality Cover
- Start a new page in Canva.
- Drag in your favourite pattern from your asset folder, resize it to fill the page.
- Create a title label using boxes or funky shape elements. Pop in your journal’s name with an easy-to-read font.
- For a realistic touch, add a crease or coil effect. Search “line shadow” in Canva’s Elements, pick a subtle shadow, make it half transparent, and position it where the spine would be.
To add even more style:
- Overlay a paper texture graphic across the whole cover, then set the transparency to 25-35%. This trick gives your journal that “real paper” feel.
Divider Pages for Each Month
I keep dividers simple but fresh:
- Duplicate your cover page, tweak the title to the month (e.g., “January”).
- Swap out the background pattern to another from your folder for variety.
- Recentre the label, adjust font colours with Canva’s colour picker to match the page design.
- Do this for each month so buyers know exactly where they are.
Personalise as much as you like, but don’t sacrifice clarity for style.
Final Steps: Duplicate, Label, and Hyperlink Everything
Before you add hyperlinks, go through each daily page and divider to check the design. You don’t want to have to redo 31+ pages just because the header font is wrong!
Duplicating Pages for the Whole Year
- In grid view, duplicate your finished daily journal page until you have 31 days.
- Rename each: Day 1, Day 2, up to Day 31.
- Do the same for divider pages (January, February, etc.). It helps keep hyperlinks straight.
Hyperlinking Your Journal
Here’s how I set up links, step by step:
- Click a month tab.
- Hit the three dots for “More.”
- Select “Link,” then pick the corresponding divider page (e.g., link “February” to the February divider).
- Remove the underline if you want a cleaner look.
Repeat for each month.
Now do the same with days. Link each day tab (1–31) to its daily page. It feels tedious, but copy-pasting the navigation bar with set links lets you paste it across pages without relinking each one.
If you need to shuffle months around (say, move February behind December), all links keep working since they’re page-based, not order-based.
Building a multi-month journal? After copying your navigation, relink day tabs for each month’s section.
Download and Quality Check: Export Your Hyperlinked Journal
You’re nearly there! To save your journal with clickable links:
- Go to “Share” in Canva, select “Download.”
- Choose “PDF Standard” (NOT PDF Print, as links won’t work in Print).
- Select all pages, hit download.
Open the downloaded file in your computer’s PDF viewer or iPad. Click on tabs, months, days, home icon. Each should jump exactly where you set it.
Once you’re happy with links, you’re ready to upload to Etsy, Gumroad, or wherever you’re selling.
Tip: Let your customers know this works flawlessly in apps like GoodNotes or even as a printable PDF.
Helpful Resources and My Favourite Shortcuts
If all this design work sounds a bit much, you don’t need to start from scratch. My talented friend Michelle, from Secret Owl Society, has a ready-made Digital Journal Template Kit for Canva. It’s fully customisable, beginner-friendly, and built to sell on Etsy.
You get:
- Professional layouts and navigation already built
- Simple editing for your own colours and content
- Fast launch without design guesswork
You’ll find all my go-to tools, including Everbee for Etsy research, in my free Digital Creators Collective. This is where I share templates, resources, design assets and ongoing support. You don’t have to learn it all alone.
One last thing—your first journal doesn’t need to be perfect. If it helps someone, even a little, that’s what matters most. Focus on making something genuinely useful, not flawless.
If you loved this walk-through, sign up for my updates or join the community for more hands-on tutorials, tool reviews, and plenty of inspiration for your digital product journey.
Let’s Wrap Up
You’ve just seen how possible it is to build and sell your own digital journal, even if you start from zero. Take your time, keep things simple, and remember that every seller started with a blank Canva page at some point. If you give it a go, I’d love to hear which kind of journal you’re creating next and what niche you’re targeting—share your ideas!
For extra templates, research tools, and real support as you grow, come join us in the Digital Creators Collective. Here’s to your first sale and helping someone make their day a bit better—with something you made.
Ready to list your first product? I’m cheering you on all the way. Let’s do this!